How to Pack Fragile Items for Shipping
Updated 2026-08-039 min readPacking and sending
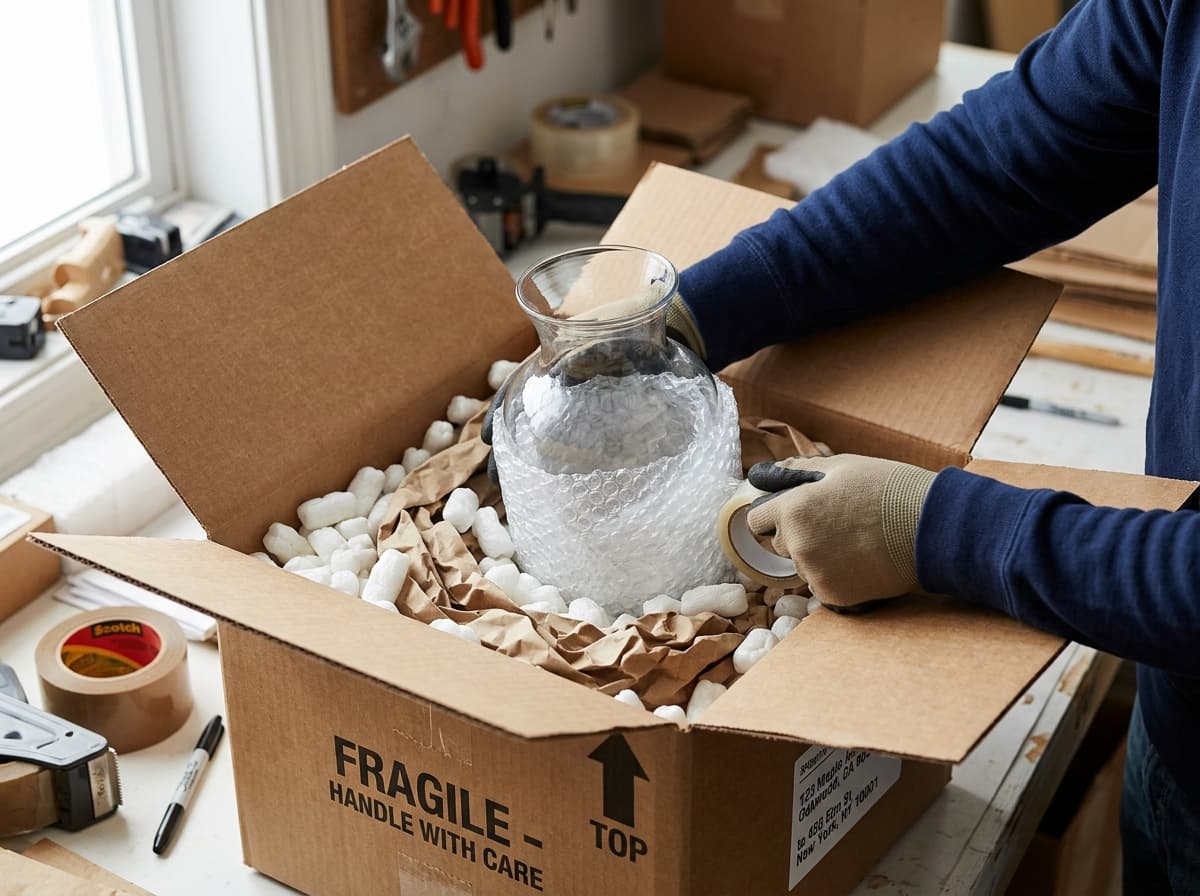
Pack a fragile item so it can survive a two-foot drop onto concrete, because that is roughly what a sorting belt does to it. That means at least 2 inches of cushioning on every side, a rigid outer box with no give, and a seal that will not pop. Everything else is detail.
The carrier is not going to hand-carry your parcel. It will be thrown onto a belt, dropped into a chute, stacked under heavier parcels and driven over speed bumps. Packing is the only thing standing between the item and all of that.
The 2-inch rule
Every fragile item needs 2 inches, or 5 centimetres, of cushioning between the item and every wall of the box — including the lid and the base, which people routinely forget.
That number is not arbitrary. Cushioning works by extending the time over which an impact is absorbed. Two inches of compressible material turns a sharp shock into a slower squeeze, and the item feels a fraction of the force. One inch roughly halves the protection. Zero inches means the item takes the hit directly through the cardboard.
The practical consequence is that your box must be at least 4 inches larger than the item in each dimension. A vase 6 inches wide needs a box at least 10 inches wide. People consistently buy boxes that are too small, then compensate with more tape.
If the item is heavy for its size — a ceramic bowl, a bottle, a motor — increase the cushioning to 3 inches. Mass carries momentum, and momentum needs more distance to stop.
Double-boxing, and when it earns its cost
Double-boxing means packing the item in a snug inner box, then suspending that box inside a larger outer box with cushioning between the two.
It is the single biggest improvement you can make, and it works because the outer box absorbs the impact and deforms while the inner box never moves. A single box transmits the impact directly through whatever is touching the wall.
Use it whenever the item is genuinely irreplaceable, worth more than the cost of a second box, or made of glass, ceramic, or thin plastic. Use it always for anything going internationally, because an international parcel is handled by two or three separate networks and changes vehicles four to six times.
The geometry matters. Leave 2 inches between the inner and outer box on all six sides, and fill that gap so the inner box cannot shift. If the inner box slides even an inch when you shake it, it will build up speed inside the outer box and hit the wall harder than if it had been packed solid.
For a modest item, a single well-cushioned box is fine. For anything you would be upset to lose, the second box costs a pound or two and changes the outcome.
Choosing the outer box
The box does more work than the padding. A tired box with soft corners will collapse under stacking regardless of what is inside it.
Use a new box, or at minimum one that has been shipped only once and still has crisp corners. Cardboard loses a large share of its compression strength after a single journey, because the flutes inside the corrugation get crushed and do not spring back.
Check the box maker's certificate, the small round stamp printed on the bottom flap. It states a burst strength or edge-crush rating and a maximum gross weight. Staying inside that weight is the difference between a box that holds its shape in a stack and one that pancakes.
Single-wall corrugated is fine for items under about 10 kilograms. Above that, use double-wall. For heavy or valuable items shipped internationally, double-wall is worth it regardless of weight, because the parcel spends longer in stacks.
Avoid these three: grocery boxes with cut-out handles, boxes with printed branding that a scanner might misread, and anything with a previous shipping label still attached. Old labels cause genuine misroutes, which is one of the reasons a parcel changes carrier mid-journey or goes quiet for days.
Cushioning materials compared
There is no universally best filler. Each one fails differently, and matching the material to the item is most of the skill.
| Material | Best for | Weakness |
|---|---|---|
| Small bubble wrap | Light items, awkward shapes, surface protection | Compresses flat under weight and stops protecting |
| Large bubble wrap | Medium items, void filling | Bulky, adds dimensional weight |
| Foam sheets or planks | Heavy and dense items, corners and edges | Costs more, needs cutting |
| Air pillows | Filling voids around a sturdy inner box | Useless as direct padding — too soft |
| Packing paper, crumpled | Filling gaps, wrapping ceramics | Settles and compacts in transit |
| Loose fill (peanuts) | Irregular shapes | Items migrate to the bottom over a long journey |
| Corrugated inserts | Plates, framed art, flat items | Only works for flat geometry |
Two combinations do most of the work in practice. For light and awkward, wrap in bubble and fill the voids with paper. For heavy and dense, use foam at the corners and air pillows in the gaps.
Never use newspaper against an unprotected surface. The ink transfers, and on unglazed ceramic or a painted finish it does not come off.
Wrapping the item itself
Wrap each item individually, even if you are shipping a matched set. Two glasses packed touching will chip each other long before the box hits anything.
Start with a soft inner layer against the surface — tissue, packing paper, or a thin foam sheet. Then wrap in bubble, bubbles facing inward toward the item, which spreads the contact points rather than pressing seven bubble edges into one spot.
Give corners and protrusions extra material. A picture frame breaks at the corners. A teapot breaks at the spout and handle. A lamp breaks at the switch. Whatever sticks out is what will hit something, so build up two or three extra layers there specifically.
Tape the wrap closed so it cannot unravel. A wrap that comes loose in transit leaves the item bare inside a box that now rattles.
For hollow items — vases, jars, mugs — fill the cavity with crumpled paper before wrapping. An empty hollow shape flexes and cracks under pressure; a filled one resists.
Packing more than one item
Multiple fragile items in one box need dividers, not just more padding.
Cut corrugated cardboard into strips and slot them into a grid, or buy a partitioned insert. Each item gets its own cell with at least an inch of padding around it, plus the full 2 inches to the outer wall.
Stack heavy items at the bottom and light ones on top, and assume the box will spend part of its journey on its side. That assumption should change how you pack: nothing should rely on gravity to stay in place.
Plates travel on edge, never flat. A stack of flat plates transmits force straight through the stack and the bottom one shatters. On edge, each plate carries its own load and the stack behaves like a wall.
The shake test
Seal the box, pick it up, and shake it firmly. You should hear and feel nothing move.
Any movement means a void, and voids are where damage happens. The item builds up momentum across the gap and hits the wall at speed. Open the box, add filler, and shake again.
Then press each of the six faces with your thumb. If a face flexes inward more than a centimetre, the box is underfilled and will collapse when something is stacked on it. Add more fill until every face is firm.
These two checks take thirty seconds and catch most packing failures.
Sealing: the H-tape method
Use pressure-sensitive plastic tape at least 2 inches wide. Not masking tape, not duct tape, not cellophane. Duct tape in particular loses its grip in cold cargo holds.
Tape the centre seam, then both edge seams, on the top and the bottom of the box. Traced out, the six strips form an H on each face — hence the name. Three strips per face, six strips total.
The bottom matters more than the top. A box that fails does so at the bottom seam, under its own weight, and the contents fall out onto the belt. People tape the top carefully and give the bottom one strip.
Run each strip 2 inches down the sides so the tape grips the box walls, not just the flaps.
Why "Fragile" stickers do so little
Write it if you want, but do not plan around it.
Modern parcel networks are automated. Your box travels on belts, through scanners and down chutes, and the humans involved are handling several parcels a minute. Nobody is reading the side of the box, and the machinery cannot read it at all.
There is one exception worth knowing. If you pay for a special handling or non-conveyable service, the parcel is routed away from the automated sort and handled manually. That is a paid service with a real operational effect, unlike a marker pen.
For genuinely valuable items, that surcharge is usually the cheapest insurance available. Our guide on hidden shipping fees covers what these surcharges cost and when they are worth paying.
Insurance, declared value and who claims
Most services include a small amount of cover — commonly in the region of £50 to $100 — and sell more above that. Declared value is not insurance in the strict sense; it is the ceiling on the carrier's liability.
Two things about claims catch senders out every time.
The sender files the claim, not the recipient. The shipping contract belongs to whoever bought the label. A recipient with a broken vase has no standing with the carrier and must go back to the sender.
Carriers refuse claims for inadequate packing. If the assessor decides the item was underpacked, the claim is denied regardless of insurance purchased. This is the most common reason a well-founded damage claim fails.
The defence is photographs. Photograph the item, the wrapping, the filled box before sealing, and the sealed box with the label visible. Four photos, taken in about a minute, are what turns a contested claim into a paid one.
Keep the damaged item and all the packaging until the claim closes. Carriers frequently inspect, and discarding the box ends the claim.
Our guide on lost or damaged package claims covers the filing process and the deadlines, which are shorter than most people expect.
What actually breaks, and why
Four failure patterns cover the large majority of damaged parcels.
Corner impacts. A dropped box lands on a corner, which concentrates the entire force into one small area. This is why corner padding matters more than face padding.
Compression from stacking. Your parcel sits at the bottom of a cage under 200 kilograms of other parcels for several hours. A box rated below its actual weight buckles.
Vibration. Hours of road transport work fasteners loose, settle loose fill toward the bottom and slowly wear through thin wrapping. This is why loose fill peanuts underperform on long journeys.
Puncture. A hard corner from an adjacent parcel pushes through a soft-walled box. Double-wall cardboard resists this; a single-wall box that is not fully packed does not.
Every one of these is addressed by the same three things: enough cushioning, a strong enough box, and no empty space inside it.
Before you hand it over
Weigh and measure the sealed box, not the item. Carriers price on dimensional weight as well as actual weight, and a well-padded box is larger than people expect — our guide on calculating package dimensions explains how the charge is worked out.
Attach one label, remove every old one, and put a duplicate address slip inside the box. If the outer label is destroyed, that slip is the only thing that stops the parcel becoming undeliverable.
Then keep the receipt with the tracking number on it. You can follow the parcel on our home page with any carrier's tracking number, and if it stops moving, our guide on tracking that is not updating explains how long a silence should last before it means anything.
Pack for the drop, not for the shelf. Everything else follows from that.